
Taking You Behind The Scenes of My Notion Content Creation Template
There was a time when there was always a new shiny project management tool to discover. I used to go down the rabbit hole and try every new system there was in the hopes of finding what would be perfect for me. The truth? Simplicity and customization opportunities always win in my books.
In this blog post, I take you behind the scenes of my Notion content management system.
Why Use a Notion Content Creation Template
Once you learn Notion, it's rather easy to customize. It's also easy to replicate and make small adjustments to your system as needed. It's a tool that can grow with you as your content needs change or if your business changes direction.
Another reason I use Notion is that for every step I have ever needed in a content system, I have been able to create or integrate into Notion with no issues whatsoever.
I am not an affiliate of Notion, but it's worth sharing that I used the FREE version of the tool for a very long time, and even the premium version is affordable compared to many other tools on the market.
My Notion Content Management System
Get ready to take some notes, as this is where it gets fun. If you've been following me for a while, you likely know that I have a lot of corporate training experience and have done my fair share of content training over the years.
Systems that can easily be replicated and that are user-friendly for many types of learners are more sustainable.
The last thing I want for myself, my team, or my clients is for a system to be so complicated that you spend endless hours looking for things. It defeats the purpose of having a content system in the first place.
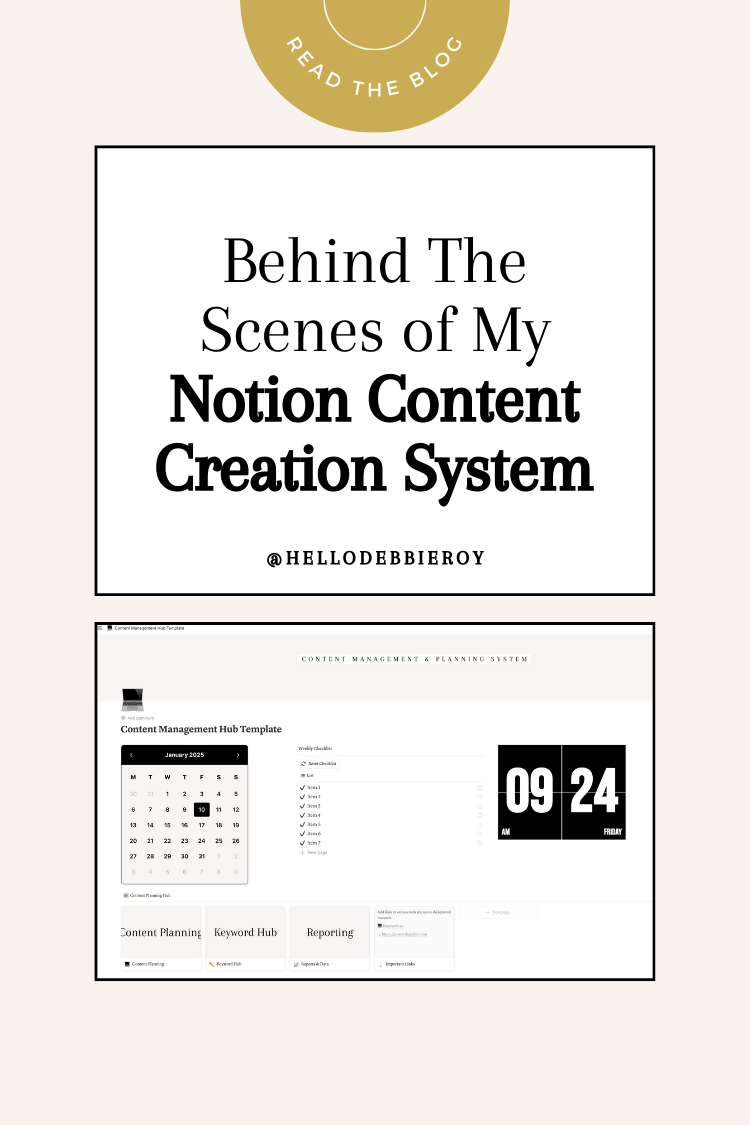
My Notion content management dashboard.

This is what you will find in the dashboard.
A calendar because it makes planning easy.
A checklist/to-do list that you can reset.
A section for keyword research tools. You can add links to the tools you like using for your keyword research.
A content planning section, which includes content repurposing ideas and a content inventory.
A keyword hub.
A reports & data hub.
In the content planning section, you will find the following information.
4 suggested ways to repurpose your content. (Customize it based on the platforms you use.)
1 Area to create your own repurposing process.
A content planning table.
A content inventory section because, let's face it, seeing everything in one place makes it easier.
How to Use The Checklist/To-Do List In My Notion Content Planner
The checklist is there to make your life easier when you plan your content. Do you need to do new keyword research? Are you onboarding a new team member, and you want to train them on how to use this template? Maybe you have a lot of new blog posts to create and need to update the content inventory.

Whatever you need to do, you can create a to-do list and check things off as they are done. When everything from your list is completed, you can click on reset and make edits to create a new list.
How to Create and Use The Content Inventory
Your content inventory is going to make your life so much easier on an ongoing basis. Never again will you say, "I don't know what I have to work with." Gone are the days when you just didn't know what to post or what to create.
Just a quick disclaimer to share that what you choose to add to your content inventory could look very different based on what type of content you normally create and/or the clients you work with.
This is what I add to my content inventory.
Blog posts
Collaborations and features such as guest appearances on podcasts, co-written blogs, etc.
YouTube Videos
Links to social media posts that have done well in the past.
A link to all of my digital products and masterclasses.
A link to my landing pages for other offers.
The beauty of this template is that you can edit anything and everything and even remove things you don't plan on using. The content inventory does take some time to complete, depending on how much content you have to work with.
Once it's done, it's going to feel amazingggg having everything in one place. Being able to visualize how much you have is a game-changer.
Content inventory details.
Inventory number. every time I add something new, it gets a number; it's a sequence starting at 1, and as I add it to the inventory, content gets assigned the next number.
Content type
Original title. No matter what it is, the original title or name of the content goes in this section.
Then, I create new titles with different keywords while ensuring the meaning remains the same. This is a step I take specifically for my Pinterest clients. For other content clients, I don't always do this.
Then I add a description which is essentially a short caption of what the content is. When working with Pinterest I will create the exact Pinterest Pin description I want to use.
Next, the content link.
If you are using this Notion content system for Pinterest and you wish to create multiple variations of your titles, below are some ChatGPT prompts you can use.
General Prompt:
I am going to give you the original title for a [enter content type] that I created. I want you to give me [enter quantity] more variations of the title while ensuring that the meaning of the content remains the same. For each new title, I want you to add either an authoritative or positive trigger word and one of the following keywords: [keyword 1, keyword 2, keyword 3, keyword 4.] Do you understand?
Pinterest Prompts:
Here is a Pinterest pin title I created: [enter pin title] I want you to create five more variations of the pin title while ensuring that the meaning remains the same and that at least one of the following keywords [enter keywords] is included in each title. The title must be no longer than 100 characters.
I am creating a Pinterest pin description for this product: [enter URL]. Please generate a keyword-rich Pinterest pin description and ensure that it includes the following keywords [enter keywords] and a strong specific call-to-action based on the pain point that this product solves. The description must be no longer than 800 characters.
Here is a recent blog post: [enter URL]. Please generate a keyword-rich Pinterest pin description and ensure that it includes the following keywords [enter keywords] and a strong, specific call-to-action based on the pain points that this blog post solves for my readers. The description must be no longer than 800 characters.
I created a Pinterest pin description for a [enter detail & enter the description]. Can you please rewrite this description to include the following keywords [enter keywords] while ensuring that the meaning remains the same? The description must be no longer than 800 characters.
I am creating a Pinterest board for the keyword [enter keyword]. Please create a keyword-rich description that is no longer than 500 characters and ensure that it includes the following keywords [enter keywords].
I am going to provide you with a blog link. Based on the link, please generate [enter number] Pinterest pin titles relevant to what readers will find when they read the blog post. Please ensure that at least one of the following keywords [enter keywords] is included in the titles you generate. [Enter blog link]
Even if we can leverage AI here to help us save some time, we still need to read the new titles to ensure that they are relevant and make sense.
Here's a glimpse of what my content inventory looks like.

Keep in mind that because I heavily use Pinterest, creating different variations of Pinterest Pin titles with different keywords is important to me. If you do not use Pinterest, this system is still for you, and you can easily customize it to remove some of the columns for the additional titles.
How to Start Using My Notion Content Creation Template
If you decide that you want to use Notion for content planning and are already using Notion and decide that you need a new system, you will love this Notion content creation template.
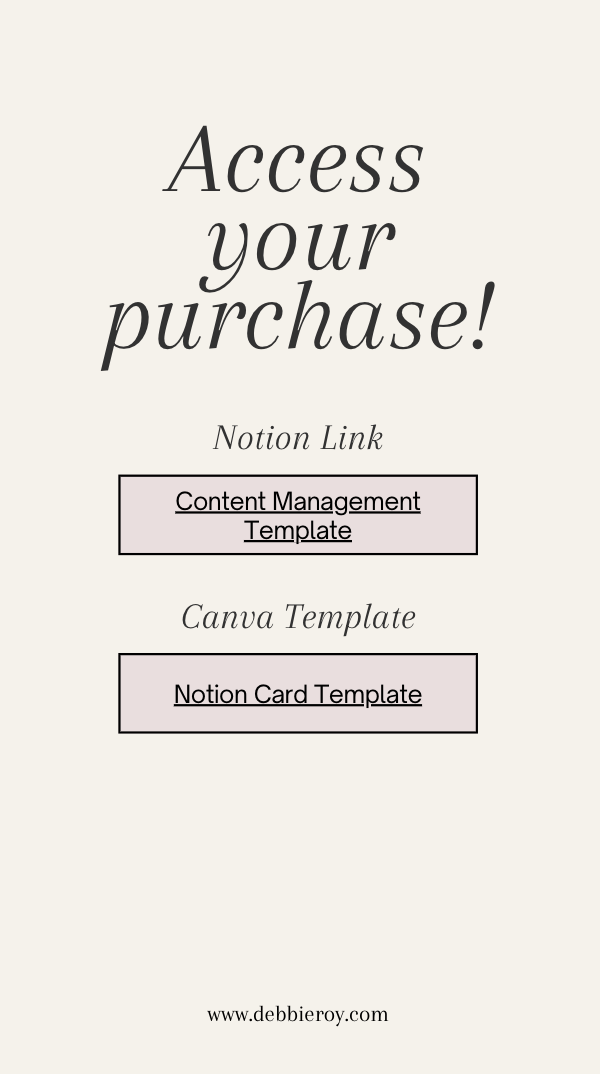
After you make your purchase, you will receive an email with a document that looks like this.
That document includes two links. One Notion link and one Canva template link.
You will be able to click on both of these buttons and/or copy and paste the template link into your browser. The template link is included in the document, it was removed from this image for the purpose of the blog.
When you click on the link, you will need to click on the duplicate icon at the top right corner.

Here's a quick tip. You can toggle between light and dark modes in Notion by going to settings -> my settings -> and then choosing between dark and light.
Once you have made a copy of the template in your Notion account, you can start using it as is or make modifications to the template.
The Canva templates are there to help you if you want to make modifications to the design.
To replace the images already included in the Notion template, you can click on the three dots and then click on replace.

4 Simple and Effective Content Repurposing Frameworks
In your new Notion content management system, you'll find these four repurposing workflows are fully customizable. These are workflows that I use with my clients, depending on the platforms we are working with. No matter what platform you are working with, these workflows will allow you to grow your reach and stay top of mind with your clients.
Sometimes, depending on my client's needs, I create a brand new workflow just for them, and so should you. So, don't be afraid to play around with these.
Starting with a blog post.
Turn the blog into a Podcast or YouTube Script.
Create at least four short videos or text posts with some important points discussed in your video.
Create a newsletter to expand on/share topics from your blog post.
Create five to seven Pinterest pins with different titles and keywords. If you don't use Pinterest, create a recurring series on a social media platform of your choice.
Starting with a YouTube video or podcast episode.
Clean Up & Turn your transcript into a blog post.
Create graphics or short videos with text overlays based on key points from your blog post to visually summarize the content.
Based on the topic of your YouTube or Podcast, create a homework post. This is where you can tell your audience to take specific steps.
Use the same topic to create a newsletter.
Starting with a newsletter.
Pick out various newsletter topics and create a recurring series of short videos. (Reel, TikTok, YouTube Shorts, Pinterest video, etc.)
Clean up your newsletter, add more information, and turn it into a long social media post or a blog post.
Share some important points from your newsletter on a platform like Reddit, Medium, Substack, or even LinkedIn.
Create quote graphics from important points or various statements made in the newsletter.
Starting with a thought leadership post for social media.
Create a recurring series where you dive into your thought leadership post in more detail. (Share it on a platform like LinkedIn or Threads.)
Now dive in a bit deeper and share a personal story that highlights your "why."
Create a post to share client stories and the transformation experienced by working with you. Think of short-form video content or carousel posts.
Educate your audience by sharing some tips based on your unique industry framework.
Need help with your content marketing efforts? Book a FREE discovery call here.